
You need tools that will always be at hand, whenever you want?
Whether it’s a quick handyman reaction, emergency repair or just a weekend spent enjoying your DIY hobby, you should always be ready and have cutting edge tools for the task, powerful enough, yet practical, a tool that doesn’t take a lot of space or time, but gives you a great satisfaction!
When it comes to daily repairs, small handyman tasks, quick fixes or DIY projects, we believe that BLACK+DECKE is the partner that deserves your unlimited trust – because with premium tools and your small handyman secrets, there is no more obstacles and boundaries.
Find a master within, combine forces with your powerful BLACK+DECKER partner and fix or create whatever you imagine...
With a 50% discount, all you have to do is roll up your sleeves and make the magic happen!
RODUCTS
BLACK + DECKER is a leading global manufacturer of tools, with over 100 years of tradition and innovative approach, which offers you advanced and modern solutions that suit all your needs.
BLACK + DECKER tools are easy to use, yet technologically advanced and made of durable materials, so you can use them yourself when working at home, but also as a semi professional for a some more demanding works - you can rely on your powerful BLACK + DECKER partner for years to come!
Terms and conditions of Program you can find here.
BLACK+DECKER INSPIRATION
Would you like to make the atmosphere in your home even better?
BLACK+DECKER tools are your partner in making small pieces of furniture – your task is to think of an idea and design, and we will help you shape and make the ideas come true with the necessary tools and simple instructions!
Just find some free time, follow the listed steps, enjoy what you do and the results will be exactly as you have imagined!
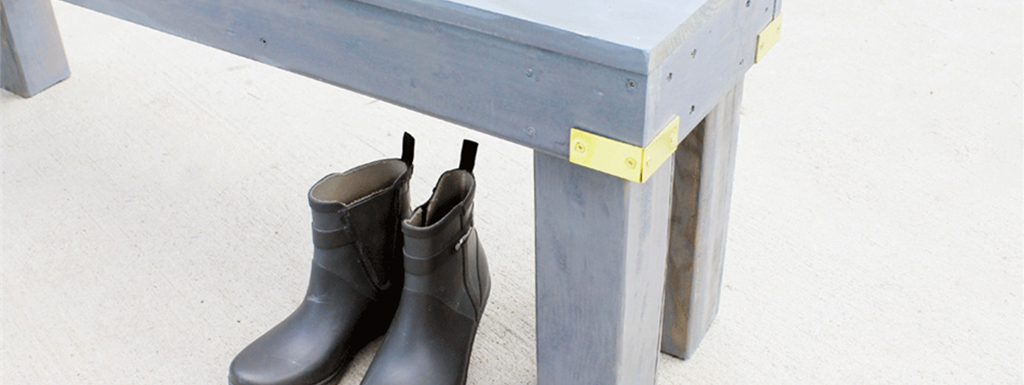
WOODEN BENCH
Relax and have a seat! Enjoy your garden this summer with a homemade timber bench.
Simple in its construction and easily customised with paint, stain or decoration, this easy, homemade bench is the perfect way to style your garden. It holds its own as a standalone piece, or you can tailor it to match your existing outdoor decor.
THINGS YOU’LL NEED:
- 18V Lithium-ion 140mm Cordless Circular Saw
- Pivot driver screwdriver
MATERIALS
- 1 piece 102x102mm untreated pine timber, 244cm long
- 2 pieces 25x102mm untreated pine timber, 244cm long
- 1 piece 25x305mm pine panel, 122cm long
- 50 exterior screws, measuring 61cm
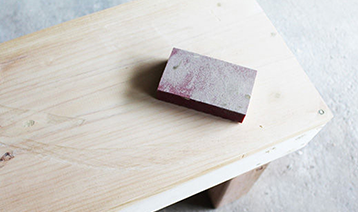
- Medium-grit sandpaper
- Fine-grit sandpaper
- Pencil
- Tape measure
- Wood filler
- Outdoor water sealer
- Wood stain or exterior paint of your choice
- Paint brushes
- Brass corners or brackets (optional)

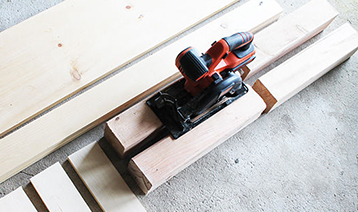
1. Cutting the Pieces
After measuring and marking your wood, use your circular saw to cut the following pieces:
- 4 legs from the 244cm 102x102mm, each 457cm long
- 2 long framing pieces from the 25x102mm, each 122cm long
- 2 frame ends and 2 frame centre struts from 25x102mm, each 116cm long
2. Construct the Bench Frame
Constructing a simple rectangle frame helps to distribute weight applied to the legs and seat of the bench and makes it easy to attach the post legs.
Line up two 116cm pieces flush with the ends of the 122cm pieces to create a long rectangle. Secure the pieces together with eight wood screws – four screws per end piece, one in each corner. Space the remaining 116cm pieces evenly in the centre of the frame and secure with four wood screws, two on each side.
3. Attach the Seat
Place the 122cm seating plank on the finished frame and ensuring all edges are flush, secure with wood screws around the edge of the frame and along the centre struts.
.png)
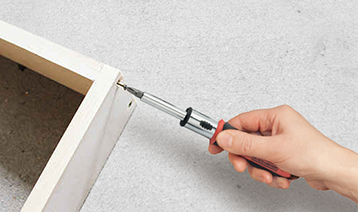
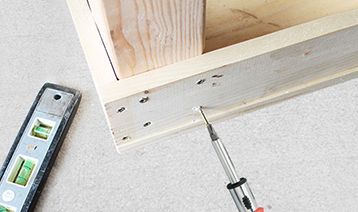
4. Secure the Legs
Place the post legs in each interior corner of the frame. Use your pivot driver screwdriver to secure the legs by driving four wood screws into each post through the frame’s exterior and seat of the bench.
5. Stain and Finish
Fill any screw borings with wood filler and sand the entire surface thoroughly with medium-grit sandpaper, then repeat with fine-grit sandpaper.
Brush off sawdust with a cloth before applying your choice of wood stain or paint. After your finish has dried, protect your bench from the elements by applying a waterproofing sealer. Be sure to cover the bottom of each leg in this process – the feet get the most exposure to standing water, so waterproofing them is key. You could also add brass corners or brackets to your bench with screws for an elevated look.